
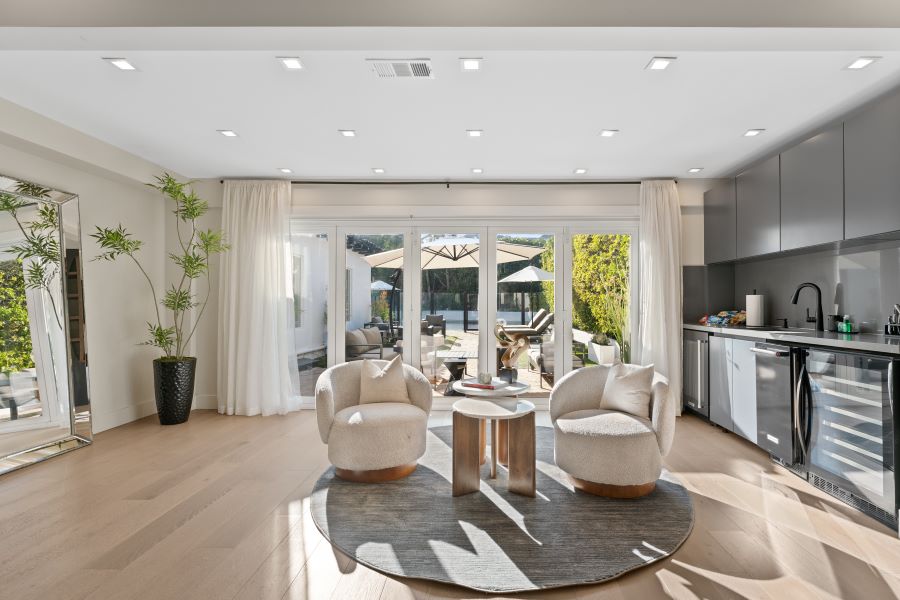
Real estate photography plays an important role in property marketing. Bright interiors and clear outdoor views help buyers understand a property’s appeal. However, bright sunlight often makes windows appear completely white. This can hide beautiful gardens, city views, and other attractive features. Real estate window pull editing solves this problem. It balances indoor and outdoor exposure to create natural, professional-looking property photos. With the right techniques, photographers and editors can produce images that look bright, realistic, and visually appealing.
In this guide, you will learn how to master the window pull technique in real estate photo editing, avoid common mistakes, and improve your editing workflow.
1. What Is Real Estate Window Pull Editing?
Real estate window pull editing is a photo editing technique that restores the view outside a window while keeping the interior properly exposed.
When photographing a room, the outdoor light is often much brighter than the indoor light. If the camera exposes the room correctly, the windows may look white. If it exposes the outdoor scene correctly, the room may become too dark.
Window pull editing solves this exposure problem by blending images taken at different exposure levels. Editors typically use Adobe Photoshop or similar software to combine the bright interior with a darker exposure that captures the outdoor view.
The final image shows both areas clearly. This creates a balanced and realistic appearance.
2. Why Is the Window Pull Technique Important?
The window pull technique offers several benefits for real estate photography.
-
- Improves image quality: It restores outdoor details that would otherwise disappear in bright windows.
-
- Creates balanced lighting: The room remains bright while the exterior view stays visible.
-
- Highlights property features: Gardens, swimming pools, balconies, and scenic views become easier to see.
-
- Creates a professional appearance: Well-balanced photos help agents present properties more effectively.
-
- Improves visual appeal: Natural-looking images make property listings more attractive to potential buyers.
A successful window pull should look natural. It should not make the outdoor view appear artificially dark or excessively colorful.
3. How to Master the Window Pull Technique
Follow these steps to achieve better results in real estate window pull editing.
Step 1: Capture Multiple Exposures
Good editing begins with good photography. Use a tripod to keep the camera steady. Capture several images of the same scene at different exposure levels.
Take one image with the interior properly exposed. Then take another with the outdoor view correctly exposed. You can also capture an additional exposure for shadow details.
Shoot in RAW format whenever possible. RAW files preserve more image information and provide greater flexibility during editing.
Step 2: Import and Align the Images
Open your images in Adobe Photoshop or another layer-based editing program. Place the different exposures into one document as separate layers.
Align the images carefully. Even small camera movements can create blurry edges or ghosting around window frames.
If necessary, use the software’s automatic alignment feature. Check the window frames, furniture, and other sharp edges before continuing.
Step 3: Create a Layer Mask
Layer masking is one of the most important parts of window pull editing.
Place the darker exposure above the interior exposure. Add a layer mask to the darker layer. Use a soft white brush on the mask to reveal the outdoor view through the window.
Work slowly around the edges. Keep the darker exposure inside the glass area. Avoid painting over walls, curtains, furniture, and window frames.
A layer mask allows you to make corrections without permanently changing the original image.
Step 4: Refine the Window Edges
Clean edges help create a realistic result. Zoom in to inspect the window frame and surrounding surfaces.
Use a smaller brush for corners and narrow edges. Adjust the brush hardness and opacity to control the transition. Avoid dark halos around the glass.
If the window frame looks too dark, use the layer mask to restore its original appearance. This step helps the window blend naturally with the interior.
Step 5: Adjust Brightness and Color
Once the images are blended, fine-tune the brightness, contrast, highlights, and shadows.
The outdoor view should be visible without looking unnaturally dark. Adjust saturation carefully to prevent overly vivid colors.
Check the white balance as well. Outdoor daylight may appear cooler than indoor lighting. Make subtle color adjustments so the two areas look consistent.
Step 6: Review and Export the Final Image
Review the entire photo at different zoom levels. Check the window edges, reflections, colors, and overall exposure.
Compare the edited image with the original to ensure the result remains realistic. Save an editable file with its layers intact. Then export a high-quality JPEG for the property listing.
4. Common Window Pull Editing Mistakes
Even experienced editors can make mistakes. Understanding these problems will help you improve your results.
| Common mistake | How to fix it |
|---|---|
| Overly dark windows | Increase the brightness of the exterior layer. |
| Visible masking edges | Refine the mask with a smaller, softer brush. |
| Unnatural outdoor colors | Reduce saturation and adjust white balance. |
| Dark window frames | Restore the original frames using the layer mask. |
| Blurry or doubled details | Align the exposure layers before blending. |
| Fake-looking exterior views | Use the actual scene captured at the property. |
The goal is to improve the photograph without misrepresenting the property. Avoid adding views or features that do not exist.
5. Tips for Natural-Looking Real Estate Window Pull Editing
Use these practical tips to improve your editing workflow.
-
- Start with accurate exposures: A well-captured exterior exposure makes the editing process easier.
-
- Use non-destructive editing: Layer masks and adjustment layers allow you to make changes safely.
-
- Keep the lighting consistent: Match the brightness and color of the interior and exterior.
-
- Pay attention to reflections: Preserve realistic glass reflections when they contribute to the scene.
-
- Avoid excessive editing: Too much contrast or saturation can make a property photo look artificial.
-
- Practice regularly: Work with different window sizes, lighting conditions, and room types to develop your skills.
You can also develop a consistent editing workflow for faster results across multiple property listings.
Conclusion
Mastering real estate window pull editing requires careful exposure blending, accurate masking, and attention to detail. By combining a properly exposed interior with a clear exterior view, you can create balanced images that showcase a property’s best features.
Start by capturing multiple exposures. Align the images, use layer masks, refine the window edges, and adjust brightness and color carefully. Most importantly, keep the final result natural and truthful.
With regular practice, you can improve your real estate photo editing skills and produce professional images that help properties stand out in competitive listings.

Pingback: 7 Latest Real Estate Photo Retouching Tips for Better Listings - Foto Homes